
The Final Straw: Constructing a Strawbale Studio
Sometimes you’ve just gotta get outta town to realise a dream… For post-production mix wiz, Michael Gissing, a distant voice was calling him South.
Text: Michael Gissing
After a holiday in Tasmania over the Christmas break back in 2006, I came to a decision – it was time to change everything. Well, almost everything. My Sydney studios had passed their financial break-even point and it was the busiest time in my life. But then a niggling feeling made me stop and re-evaluate my situation… something still wasn’t right.
I was so busy at the time that I had no life outside of making the silliest deadlines possible and always saying ‘yes’ to clients. The studios I had built at Clareville in Sydney had been very successful in function but there were still some design improvements I knew I could make if I had just one more go at it. Yet I also knew it was sheer indulgence to build another studio! But staying in Sydney with a massive house debt, rising interest rates and an above-average contribution to global warming wasn’t something I could, in all conscience, continue to do. These three factors were what drew me into the craziness of moving to rural Tasmania and building, not only a studio, but a house as well.
THREE LITTLE GOALS
Three goals were clear: to establish a semi- rural life with land enough to hobby farm; unshackle myself from the workaholic madness that had become my life by becoming debt free and working less; and radically reduce my carbon footprint. To achieve all this, my wife and I determined that rural Tasmania was our only choice of location.
We chose a 40-acre block, 40 minutes from Hobart, in the dynamic local community of Cygnet. Hobart architect Nigel Jones came to our attention as someone with solar passive design skills and an interest in my wildest ideas – a totally passive air-conditioning system and strawbale walls.
STUDIO REQUIREMENTS
Being a Post engineer my main requirements for the new studio design were two edit/mix rooms with access to a machine room. I also needed a fourth room to record occasional voice-overs and Foley, but based on my previous studio experiences, I wasn’t prepared to dedicate a space for recording as the last recording space wasn’t previously used often enough to justify it. Instead, the new studio plan included a ‘utility’ room that would serve as my office, a client lounging area and occasional recording space.
One mistake I’d made in previous studios I’ve constructed involved access and placement of the machine room. Previous incarnations of my setup had proved that central access and ease of wiring were important. However, I had never paid enough attention to the climate control aspect of the machine room, and as a result, they have always drawn enormous amounts of power for air-conditioning. Locating the machinery to allow easy access while also isolating the room thermally was my new challenge in the passive design. Indeed, the biggest area for improvement over my previous studios was not in acoustic, but thermal control. A power audit in my Clareville studios had shown that air-conditioning constituted 70% of my power consumption, partly because I wanted different temperatures in the machine area to the comfort levels in the studios. Thanks to the layout of the previous setup, warmer air from the studios was constantly mixing with the machine area, so the air-con was constantly fighting itself. Fortunately, there is a material that links thermal and acoustic design. For me that magic ingredient is straw.

The walls have delicate curves and lack the harsh flatness that is also the cause of unhappy sound reflection.
THE ST-RAW MATERIALS
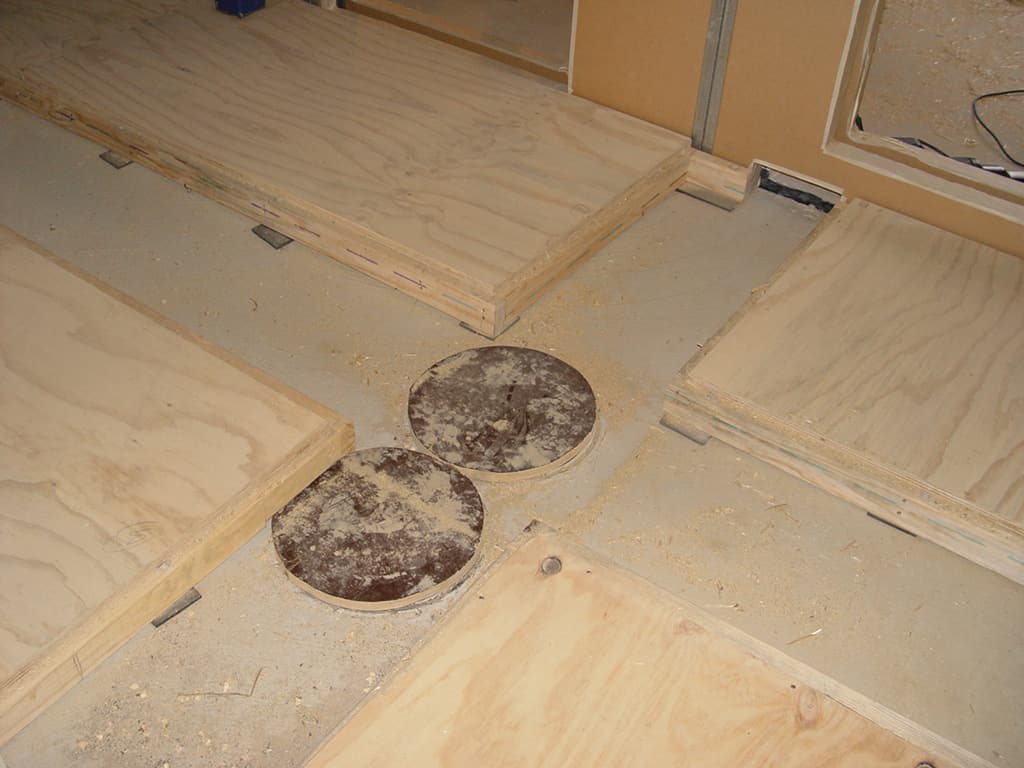
After 18 months of planning, designing and with many trips and on-site discussions with the architect, we finally got council approval and had local builder, Jack Binnie, ready to go. The slab work for the studio and house started during December 2007 and was ready for the build to start mid January 2008. Isolating the two studio rooms from the machine area and the rest of the house was important for sound transmission, so right at the beginning of the process four separate slabs were laid. This isolated the spaces at the foundation level – something I’d never been able to achieve before.
The edit/mix rooms were designed with an angled rear wall and angled ceiling to avoid the obvious standing wave problems in rooms with parallel surfaces. My Clareville room shapes were rectangular, constrained as they were by their location under my existing house, and despite dampening the walls with Tontine and constructing bass traps, I was never able to achieve a smooth bass response. Sick of telling clients that the bass was a bit loud if they sat up against the rear wall, I decided this time to take the square and parallels out of my rooms.
PASSIVE AIR
While still at the slab stage, work on my underground passive air system was also started. The principle is simple; unlike air temperature, ground temperature varies by only a few degrees from summer to winter. The thermal mass of the ground buffers the temperature swings that happen on the surface. To take advantage of this natural phenomenon, long large poly pipes buried in the ground would bring moderated air from underground through the slab and into the studio, via floor vents. Outlet vents in the ceiling would then take the warm air out via venturies in the roof (which use the energy of air moving past a valve on the roof to create low pressure inside which ‘sucks’ the air out), drawing fresh air into the studio from underground in both summer and winter of around 12–16 degrees celcius.
The combination of thermo syphoning, where hot air rising creates the energy to draw cool air in from below, means that a lot of air is drawn in slowly and silently from underground without using power. The heat syphon effect plus the venturies on the roof would provide fresh country air to people and machines alike, without the need for noisy fans or any other moving parts. The only remaining issue in the low humidity environment of Cygnet was to heat the studios in winter – but not the equipment room! The heat generated by racks of computers and video gear creates a thermosyphon, which would help pump the air through the gear… like a chimney. (It’s important to note that in humid climates, this system would need de-humidifying, which is what powered air-con systems do well.)
In the machine room, two 450mm diameter tubes were set into the slab, with 90 degree elbows to bring them out horizontally past the slab edge. They were designed to be directly underneath the three racks of gear so that rising heat would draw the cooler air straight up through them. In each studio, one 450mm tube was set so that a crossflow to ceiling vents at the other end of the room would bring fresh air in, cooling them in summer and providing some warmth in winter. Electric heating panels would provide extra warmth in winter also. But the tubes for the passive air system haven’t been buried quite as deep into the ground as I’d hoped. Time will tell if we get a moderated heat in summer that is low enough to keep humans and equipment happy.
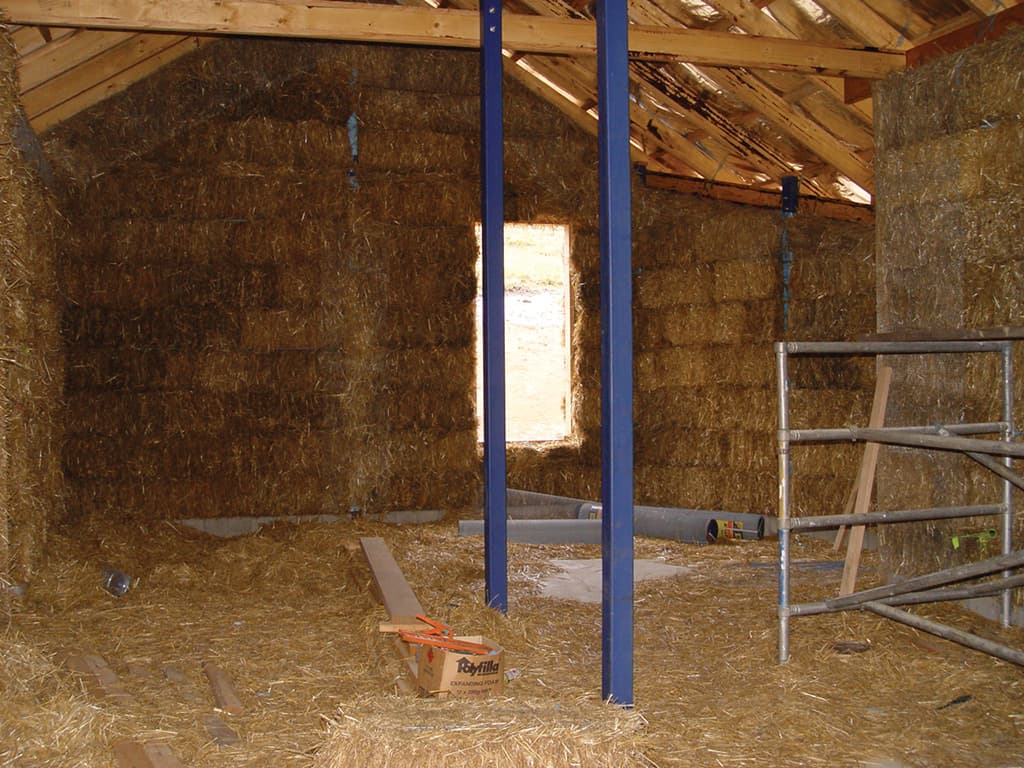
The efficiency of the system also relied on the extraordinary thermal characteristics of straw. Having rooms that heavily insulate the internal environment from the outside world would also mean less work for climate control. Straw bales were the first material my wife and I decided on for the house and the more I read, the more I became convinced they would also be a great choice for the studio walls. A mud rendered wall made from standard 450mm strawbales has an R-value of between 30 and 40, depending on the quality of straw. Compared to that, standard pink bats range from an R-value of 1.5 to 3.8, so straw offers a whopping 10-fold thermal improvement over conventional walls! The other attribute of straw is that it’s full of air, providing excellent characteristics of sound attenuation thanks to its complex internal structure.
But while strawbales were an obvious choice of materials for the outer walls, they couldn’t be used to construct a ceiling. And since it would be cheaper and easier to make the inner walls out of the same panels as the ceiling, we had to look for an alternative companion product. We still had to design internal walls and ceilings with similar excellent thermal and acoustic characteristics as the outer structure, or the excellent performance of the outer walls would be for nought. Joining the ceiling panels to the strawbale walls was difficult so we decided to simplify the inner walls to make sure we could get an airtight seal, particularly as this wall separated the studios and the machinery, the two major sound spill areas.
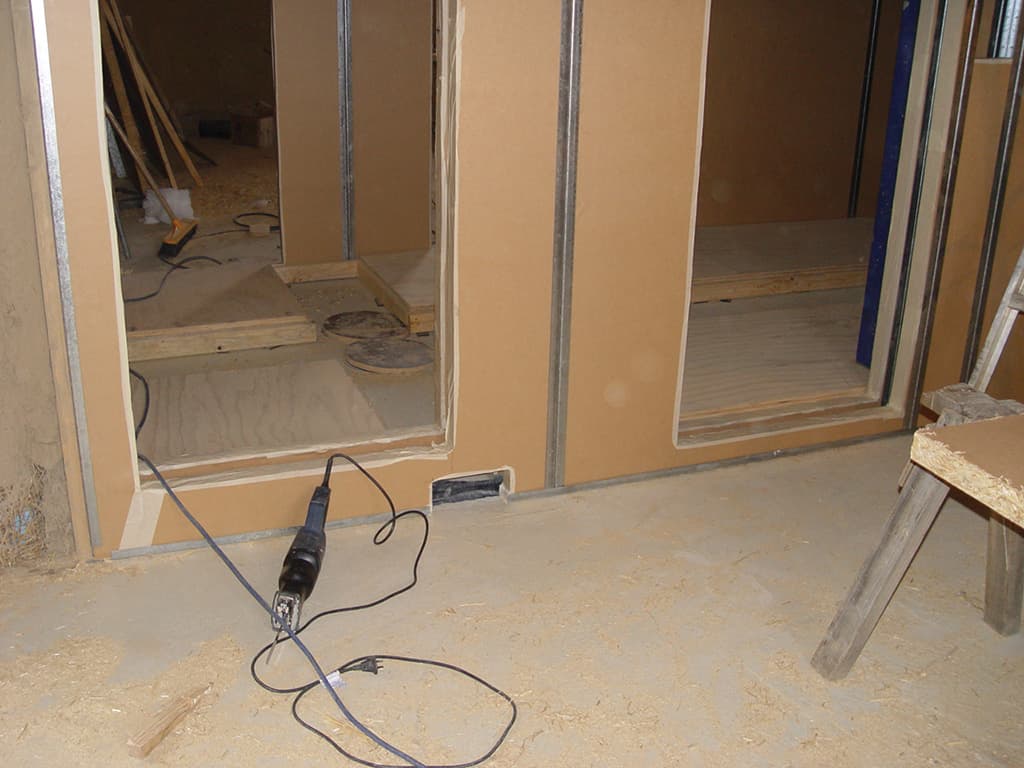
Our architect, Nigel Jones, introduced us to a product called Durra Panel, which is made of compressed straw sandwiched by board. This was ideal for the inner walls and ceilings. The outer roof was always going to be Colorbond steel to capture our vital water supply but a tin roof, as any Australian worth his salt will tell you, is noisy! Something had to work to dampen this sound above us. To that end, Durra Panel has a published spec of 25dB broadband noise attenuation so we designed a double skin of this material with an inner air gap to isolate the studios from the roof and the machine room. Each skin would be on a separate slab as well, with the air gap over the slab gaps. So between the noisy machinery room and the studios we could expect over 50dB of attenuation, and from studio to studio, at least 100dB attenuation! Doors to the rooms were to be solid core wooden doors with Raven seals all round, including bottom seals that push down as the door latches shut.
SETTING UP SHOP
So much for theory, what about practice? As we all know, building is often about compromise, but when it comes to a successful (and relatively soundproof) studio, compromise must be minimised! There’s no use shrugging your shoulders in defeat the moment a practical issue arises; your soundproof studio relies on vigilance throughout the construction phase!
The first major compromise from my point of view was having to stay in Sydney to finalise audio jobs, sell the house, pack and then move, so I wasn’t around for much of the building phase. Thankfully, my wife was able to head south from the outset to oversee the project as the owner builder. Having been with me during the Clareville studio build, she had the basic mantras firmly implanted in her brain: “Keep the slabs apart;” “Floors don’t touch walls;” “If air gets in so does sound!” By mid April, the studio end of the Cygnet build was done so I loaded up a truck and hit the road. I had less than two weeks to pack, move and rewire before starting projects again down south!
My wife did a magnificent job of nursing the building from the initial plan to actual structure. By the time I turned up with the truck, the studios were almost finished and they were a joy! Apart from the air tubing depth, every aspect of isolation, thermal and acoustic design met or exceeded specifications. I even had cable ducting for easy under-floor access and Foley trays built into sections of raised floor – full of gravel, sand etc – to make Foley sound effects. And it looked amazing.
SETTING UP THE GEAR
Rewiring the studio gear was necessary the moment I arrived in Tassie. This was mainly thanks to changing from a dSP system to a Fairlight Xynergi a month before moving. I decided to wait until I arrived in Cygnet before fully decommissioning the old dSP system, and also took the opportunity to reconfigure gear in the racks to drop old formats like DAT and DA-88.
Mark Keating, who helped me move and wire every studio I’ve ever owned, flew in from Perth, and Mike Jones, my main sound editor, moved from Sydney for a six month ‘tour of duty’ in Tasmania. Together, we sat at the racks and designed the studios from the patchbay. On a patchbay, normaling means that as few patch leads as possible are used when ‘normal’ work is being carried out in the studio. Designing from the patchbay outwards is also a great way to organise cables and end up with an efficient workflow. The combined experience of three operators went into making this the neatest and most powerful studio I have ever had the luxury of owning.
INVESTING IN WIRING
Well-labelled, beautiful wiring is a great investment and to that end Mark’s work is high art in my opinion! The fact that so far only one cable has needed fixing has meant I’ve been able to get jobs done even while the wiring was still being finalised. Wiring with a small experienced team is the best approach. Although keen people offered to help – and I was grateful for the offers – too many people is inefficient when it comes to wiring a studio. The risk of mistakes is increased and they’re much harder to track down later.
I originally designed the studios to make sure as much cabling and furniture from the old rooms would work in the new studios. Building is expensive, but an often-underestimated cost is the rewire and internal rebuild. What’s more, I only had a fortnight to get the studios ready for the first mixing job, so reusing cable looms, benches and monitors was an important part of the budgeting, plan and timing.
A lot of air is drawn in slowly and silently from underground without using power.

THE EMBODIEMENT OF A STUDIO
Building an environmentally friendly studio quickly makes you aware of the ‘embodied energy’ that goes into a new structure, i.e. the energy that’s used to make the materials you use. So things like fuel for the tractor that cuts and bales the straw and the trucks that deliver the concrete, straw and wood all constitute ‘embodied energy’. Not to mention the power used to manufacture all the different materials like timber, cabling, computers etc… it’s a long list. To minimise the amount of ‘embodied energy’ the strawbale studio would use, the aim in Cygnet was to source as much material locally as possible and design a house and studio that required minimal energy to run. Even though this has been achieved, it will still take years of tree planting to begin to absorb the carbon debt I’ve incurred building the new space.
NOISE GENERATORS
Once desks, speakers, amps and basic cables were in I couldn’t wait to crank up some noise and test the room acoustics. As Andy Stewart’s articles have stressed in recent issues of AT, a room with a short, controlled reverb is desired. Pink noise was cycled through the 5.1 speakers but without a fancy test rig, I was using my ears and the age-old habit of wandering around clapping to look for ugly reflections and pings. To test the difficult bass end, we left the pink noise running to the sub-woofer and crawled about the room listening for lumps and dips. To our joy we found the room extremely even with only a tiny coupling boost in the two right-angle corners. We took advantage of that by placing the sub-woofer in one of those corners. The other corner is in the doorway so it’s of no consequence because no one was going to be monitoring the mix there! By trimming a few dB off the sub volume we quickly established a great balance and smooth response throughout the seating areas.
There’s still a slight ping in mid frequencies between the only two parallel walls but the intention was always to Tontine the walls to the machine room and cover them with timber frames and cloth runner. The fact that the rooms are also a bit live is a good thing, as the Tontine will also dampen this down as well as remove our only ugly reflection. I hope we will get close to Andy’s perfect 0.4-second decay, and if I can get him to bring his test gear to Tassie, I will know for sure!
Although building the ceiling with a slope was a difficult problem for the builders, it has certainly helped the acoustics. The ceiling Durra Panel sheets were hung from the rafters with rubber-lined brackets to minimise rain and thunder noise getting in. Carpet on the floor has also made a big difference.
PUTTING THE BUILDING THROUGH ITS PACES
The builders were still fitting doors when I first arrived so it was a week before we were able to test the sound isolation from studio to machine room and between the studios. Raven seals had been fitted to the doors but the bottom seals were not yet in place, so there was still a bit of sound leakage. We initially tested the rooms with rolled up blankets to seal the bottoms of the doorways, but even with this temporary measure in place the Durra Panel walls were doing an excellent job and isolation was fantastic.
To stop noise getting between rooms via the air vents we built two traps: one outside to stop ambience getting in and the other in the ceiling space where the vents fed into the venturies. The outside trap is a modified septic tank lined with sound absorbing foam. The 500mm pipes feed into the tank and the outgoing pipes that then feed out to the fresh air are mounted at right angles. Low frequencies like thunder rumble can make their way in, but since we’re not monitoring ‘live mic’ recording, the need to totally sound isolate ourselves from the outside world was deemed too expensive, and more to the point, unnecessary. We were also miles ahead in that the air feed had no fans, so the only noise that can get in is thunder… which is rare in Cygnet anyway. In the ceiling, a coffin-like box was made that was also designed to trap sound spill from room to room, and from outside to in. As I sit writing here in the studio now it is absolutely silent, even with builders running circular saws and nail guns not 15 metres away (they’re still finishing the house – you can see where my priorities lie!). On a normal day we’re in a quiet rural area a kilometre from a major road and with no flight paths overhead. Even our Lowline Angus (cows) are quiet and don’t moo all that often.

STRAW STUDIOS ARE WARM, CUDDLY EVEN…
In the month since moving, two docos have been completed, and as winter sets in the thermal properties of the system are being tested. Crunching through frost the other morning on my walk in the paddock to check our cows I was well rugged up against the near zero temperature. Walking into the studios I did my daily thermometer check. Studio overnight – with no heating – 12C; Machine room at the top of the rack, 14C (which is explained by critical hard drives & NAS units remaining powered on overnight); air duct, 12C. As the sun streamed into Studio A, I left the heating off and it soon climbed to 16C. Being on the north side it benefits from solar passive gain through the large double-glazed windows.
Measurements so far with lots of gear running on a typical working day at the top of the rack has never gone past 20C. Summer will inevitably test whether we can keep the gear cool, and winter will be easy to control with mild supplementary heating. By concentrating on thermal design I have also achieved better acoustic performance than I had anticipated. Straws offers excellent performance in both these critical areas. I am hoping to do a power audit soon to see if the reduction in power target of 75% has been achieved, but as I measured it with the house at Clareville, I can’t do that until the builders are done and we’re living in the house.

SUCCESSES & FAILURES
So far the results achieved are as expected or better than we’d hoped. But this is real life, and there have been failings in the design and build. Firstly, strawbales are a difficult material (we’re using wheat straw). Sourcing them initially proved difficult due to the drought that affected grain growing areas in Tasmania’s north. Although, as a building material straw is relatively cheap, trucking in bales wasn’t and Murphy chipped in by making sure the only rain that fell for months arrived on the day they loaded the straw onto the truck. When it arrived, it had to be constantly moved about to dry out.
With only the roof area of the studio completed when the straw arrived, some of it had to be stacked in the open to keep it out of the way of the builders. This meant we had to use tarps to cover the stack whenever rain or heavy dew threatened. This was a real hassle.
Then, in the middle of the build, Tasmania had a windstorm with gusts up to a record 170 kilometres per hour. A large bundle of strawbales wrapped in a tarp was blown over and the bales were strewn into the paddocks. Most of the roof was on, but without doors and windows, there was a chance the whole structure could be lifted and dumped onto the paddocks. My wife spent a terrifying night in our shack with two petrified dogs with the room shaking and shaping to take off.
Mud rendering is a slow and expensive task. Some people take a short cut and cement render their straw. Cement, however, stops the walls from breathing and also tends to wick moisture into the bales, so although it’s cheaper and more expedient to spray and trowel finish, it doesn’t work as well and can lead to strawbales deteriorating, leading to a loss of insulation and acoustic isolation. But mud is messy and time consuming. Layers have to be hand toweled on and time taken to let each layer dry. With the house nearly to lockup we are still rendering and only the studio end has its final lime coat so it is fully weatherproof. But much as I have a love/hate relationship with straw the local field mice just love it. Once doors and windows were put in the studios the job of trapping and killing mice became possible although it is ongoing. I am glad we will hopefully have the varmints out of the house and studio by summer because they would bring snakes. Ah… the delights of country living!
The Durra Panels also gave us some grief. The suppliers in Melbourne were disorganised and slow to deliver, which meant the builders had to put in a very long hard week and weekend to get the wall and ceiling panels in before I arrived with a truckload of gear. The panels are heavy and a special lifting jig was required to position the ceiling.
Attaching anything to a straw wall requires a lot of forward planning. Timber needs to be wired in and rendered over, as mud doesn’t allow anything heavier than a picture to be hung from it. Where the Durra Panel met the wall, a short section of panel had to be pre-attached to the wall and rendered up to so that the main ceiling could overlap and be silicone sealed. Strawbale walls are also never straight, so making sure inner walls seal to outer walls is always a creative exercise. The acoustic blessing of soft lines is a curse when builders have to make things meet and seal as tightly as possible. Gaps are a double hazard as those pesky mice just love to invade the walls anywhere the tiniest holes exist!
The ongoing issue of damage to walls also needs to be considered. The final mud render will need a paint type seal to stop dust shedding but the render is not hard like concrete so a casual encounter with a chair and a wall will need repairing. The mud comes from our house site so mixing and fixing is not a problem. Many people make the mistake of mixing an oxide colour into their render but this makes it impossible to colour match when repairs are done. A better way is to use a lime based paint wash, which can be repeatedly mixed so that repaired sections can be colour matched.
We did have a slight issue with the local council too. Our land is rated rural so conducting a non-rural enterprise, although legal, is only meant to occupy a small floor area. The local planning people were helpful and pragmatic so that rooms were labelled “home theatre” and “rumpus room” to help with compliance. We are also farming, although not on a commercial scale, so the bulk of the land use is as intended. Telstra performed worse than expected – and we expected so little! Six weeks after their promised date, we finally got phone and internet on after days on hold and various threats to the wellbeing of their first born! As this sort of communication is vital to anyone in our business and even more so when clients are mostly interstate, I look forward to competition in that particular marketplace.
In keeping with our philosophy we have successfully reduced our carbon footprint while designing a studio that’s great to work in. I remain out of debt, although the building isn’t yet finished. Importantly, I am more relaxed than I’ve been for years, in spite of the stress of moving and building. The studios and house have wow factor – but in an organic way – and I look forward to years of productive creative work in what I hope is my final studio. I have built on years of experience and would like to think I’ve saved the best ideas till last! Now, back to mixing…











Michael, thanks for sharing. How does the straw keep from settling or deteriorating over time? Isn’t it still organic?
Hi Josh, thinking about going the bale route? This from Michael Gissing. Who’s still operating Digital City Studios out of the straw bale studio and loving it.
“Josh the straw isn’t load bearing so there is no problem even with a little settling. The bales are tightly bound so unless there is rotting then the straw stays in place. Mud rendered walls, lime render on the exterior and good damp coursing means that the bales stay dry inside the walls. Eventually the materials might start to break down but an anecdote from a straw house renovation in Nebraska was that during an extension to an eighty year old house, part of the original straw wall was exposed as the new extension was added. Some cows broke in to the house yard and started eating the straw so it was still fresh enough to eat after eighty years under the mud render.
After six years the studio is still amazing to me. The passive air has proven to be perfectly able to control wild swings of temperature and keep the humans and the computers happy. Sound isolation has worked as planned and the final acoustic for mixing is just right.” – Michael.
[…] to the compacting of the straw making the density high. Here are some articles on a straw studio. Link and Link Alan. http://www.witzendstudios.com/ Reply With […]
Hi Michael,
Hope you may still get this as it’s been a while since this was posted!
What kind of air exhausts valves are you using for the passive air system. I would like to use the same kind of system in my small project studio build.
Hi Micheal,
I came across an artical that you wrote about a YAMAHA 03D DIGITAL MIXING DESK a while ago. i wonder if you could give me some guidance into solving my problem. i have tried contacting yamaha and sent dozens of emails but still no resolve. the mixing desk will not boot up but comes on and shows me that it is missing a block file . this is preventing the desk from booting up.I wonder if it is looking for some file outside of the box I tried to get some software editor stuff and made up a computer connect cord etc. I need the original files to load into this desk to reboot it. i even tried removing the battery to zero the memories but to no avail. this desk was given to me as the owner could not fix this problem. with your experiance and knowlege i wonder if you could help me
I note that you moved to Tasmania. Ii think you did the right thing. I live on the west coast of south africa near the Koeberg Nuclear Power Station. The place is called Duynefontein, you can search it on google maps.
I used to work for a company in the late sixtys and worked a lot with stage sound and amplification. do you remember the 1000w crown ampliers. I want to build a small studio as a hobby now that i have stopped working. Will be turning 70 this year. I am also a amateur radio chap hence my email is my call sign.
Best Regards
Yours sincerely
Roderick Spradbury